Let's see if I have everything that I need:
- Arches Bright White Hot Press 140lb 22"x30" sheet of paper.
- Jack Richeson Light Duty Stretcher Bars (2x 9" and 2x 12").
- Staple Gun and Staples
 Oops. I know where the staple gun was in the garage. Not sure what happened to that one. A neighbor may have borrowed it. But that's been years ago. My wife has one. Can she find it? Nope. Ah, my son borrowed it. He'll bring that back. Of course my wife notes that it's not as heavy duty as I probably need for this task. Hmmm... Where's that Michael's 40% off coupon? Ah! Got it! Okay, mark all of them with a check mark! Okay, I'm set to start.
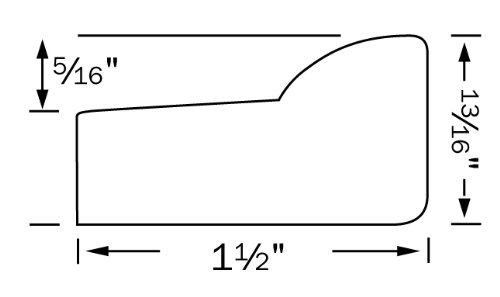
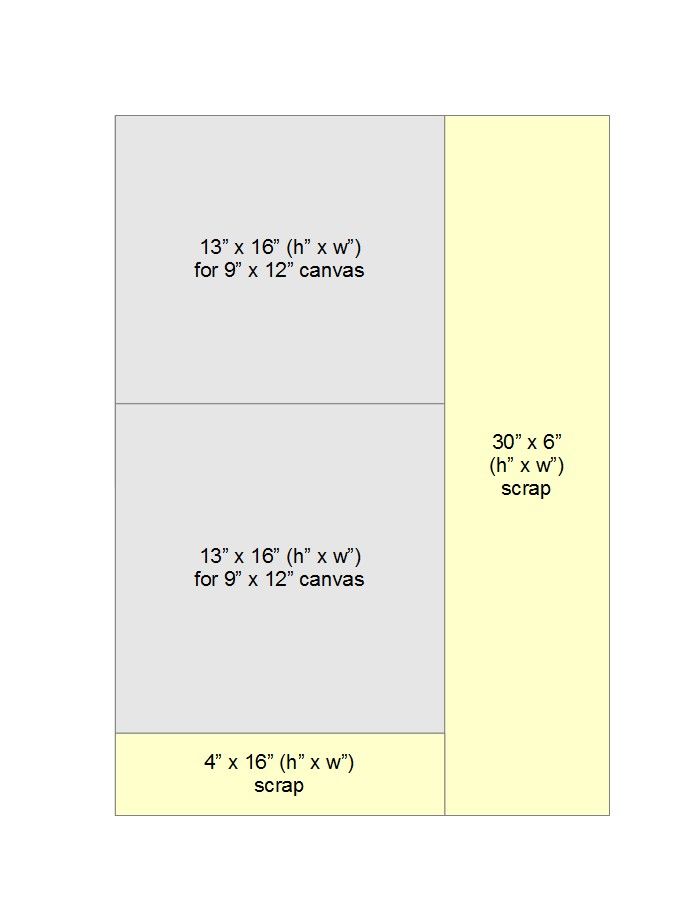 Now, let's do some planning. As you can see from the side profile of the stretcher bars, the paper wraps around quite a ways. The paper "canvas" will be across the top "floating" above the stretcher bars. The paper then wraps around the right hand side and along the bottom toward the left hand side.
So, we need to allow 2 inches per side for the "canvas wrapping". That means we need an extra 4" on each dimension to create the final 9" x 12" size painting. So, we need a sheet of paper that is 13" x 16" in size. As you can see from my layout sheet, that means we can get two watercolor "canvases" from one 22" x 30" sheet of watercolor paper. I can use the scrap paper for other projects. But if I do more of this, it seems that this would be best done with a roll of watercolor paper.

 Ah, well. Time to prepare the stretcher bars. As you can see, I just press the joints together to create the final shape. Of course, this takes a little tapping with a wooden handle (such as a hammer's handle) to move the stretcher bars into a square shape. Don't just "eyeball" it. Check it with a square. And then double check it by measuring both diagonals from corner to corner. They should both be the same measurement. If not, it's not square. Cute trick! But handy. It's far more accurate than just using a square.
 Okay, the frame of the stretcher bars are together. But I can't just lay the paper over them "as is". I need to seal them to prevent the acids in the wood from damaging the paper. I will just use the UV Archival Varnish to seal up the wood.
Now to cut the paper. To cut large sections of paper or mat board, I have a Logan Adapt-A-Rule with a Logan Pull Style Mat Cutter. I will measure the paper and cut it. into two 13" x 16" pieces and save the scraps.
Once I've done the cutting and have soaked the paper, I will take some pictures of the process of wrapping the stretcher bars and the resulting watercolor paper "canvas".
No comments:
Post a Comment