First, you might find it helpful to understand more about the parts of a framed painting.

The Frame Package
The Frame
As you can see, the frame is actually the (typically) wooden structure that holds all the components.The Glaze
The glaze is typically glass for paintings. But it can be acrylic. One thing to know is that the UV light in sunlight causes fading, especially with ink. In that case, use of glass or acrylic with UV protective coatings is very important.The Mat
 Though somewhat decorative, the mat serves a functional purpose. Without the mat, the artwork would be against the glaze, which would eventually damage the artwork. Use of 100% cotton matboard is very important, since that means the mat does not contain any acid, which would slowly yellow the artwork. Any acid in the paper of the artwork or in the surrounding materials would cause the artwork to yellow like an old newspaper.
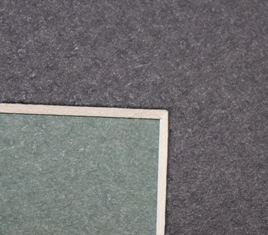
Though initially the mat was only cut straight, it is now typically cut at a 45% angle, showing the core of the mat board. This decorative touch has become the standard. It is of course possible to create double mats to increase interest in the framed picture.
The Art
 |
| Lineco - Mounting Corner |
 |
| Lineco - Self Adhesive Hinging Tape |
Hinging tape allows a small amount of cloth (non-acidic) tape to be connected to the top back of the painting. This is then crossed with another piece of tape to create a "T" and to connect the "hinge" to the mounting board. This minimizes the amount of the painting that the hinging tape touches, but provides a very sturdy connection that is archival safe. Typically, it can be reversed (removed) if needed. This same tape can be used to connect the top mat(s) to the mounting board.
The Mounting Board
 |
| Lineco - Frame Sealing Tape |
The Backing Board
The backing board is typically either a foam board or some other conservation safe material. I typically use a piece of foam board. This helps protect the artwork from bumps and brusies.The Dust Cover / Sealing
The frame package should be sealed. Typically a conservation safe paper is placed over the back and the frame is sealed, such as with Lineco Frame Sealing Tape. Since I use foamboard, I just seal the foam board and the frame with this tape.The Bumpers
Since the picture typcially sits against a wall, it's important to use bumpers to move the frame away from the wall just a little bit. This allows air to circulate all around the frame. Without this moisture can build up behind the framed artwork and seep into the framed artwork, causing damage. Though the bumpers also help protect the walls, their most important job is to protect the artwork.The Hanger

 I fought with too many eye hooks on picture frames in the past. So, I decided to upgrade to Ook ReadyScrew D Ring Hangers. These allow me to quickly and easily install the hanging hardware. I use a picture wire rated for 45 lbs. for the wire. This should cover almost any frame that I would create.
I also use the Ook Padded Pro picture hangers on the wall. While there are other picture hangers, I've had a lot of success with this Ook model. It is easy to use - even if you have clumsy fingers (as I do) - and it causes the least damage to the walls.
 |
| Alto's EZ Mat Cutter, Model 4505 |
Mat Cutter
So, I did research on various mat cutting systems. Logan is the best known. But another, which is quite easy to use and has a good reputation for keeping their quality high is Alto's EZ Mat cutting system.Right now, Alto's has two different models. Their models are the entry model 4501 and the professional model 4590. They used to have a middle range model, the Model 4505. The difference between the 4501 and the 45005 was that the pieces that hold the mat cutter in place are made of metal in their middle of the road model. But they no longer sell the middle of the road model. I wanted the metal components, since I tend to be a bit on the clumsy side and plastic breaks under such rough handling.
 |
| Alto's EZ Mat Cutter, Model 4501 |
Compare the components you see on the right. While the entry model would work for me, I just worried that after two or twenty mats it would start to have problems.
Fortunately, I found a Model 4505 Mat Cutter system on ebay. It had never been used. In fact most of the contents were unopened and in their original taped boxes. So, I now have a mat cutter that should hold up under normal use and even withstand my clumsy handling.
No comments:
Post a Comment